Python Bottle - TypeError: Secret key missing for non-string Cookie.

Python Bottle - TypeError: Secret key missing for non-string Cookie.
I was trying to set several cookies using the Python Bottle micro framework and ended up getting a 500 server error along with the above message. So I searched Google to find a solution for this, but I couldn't find any webpage that would help me. Then I opened the Bottle's documentation and read the cookies section, and there was another sub section under cookies, called Signed Cookies.

There I found that response.set_cookie() accepts a third parameter to encrypt the stored cookie. Although it's mentioned in the documentation that the cookie is still readable by the user, it was not directly readable, meaning it had an encryption. Apparently, the error was solved by using this third parameter, but when I try to read the cookie, it was encrypted. But I wanted to have a non-encrypted cookie.

But if I tried to use the response.set_cookie() without the “secret” parameter, it always gave me this error. TypeError: Secret key missing for non-string Cookie. Since I was not ready to keep the cookie encrypted, I tried to find the error in my code and found that I cannot have non-string cookies without the encryption. The third parameter was not needed if it's a string. But if the cookie value is something other than a string, say an Integer, it had to be encrypted with the secret key parameter.

Here is a section of the original code.

            response.set_cookie("session_key", login_user[0]["session_key"])
            response.set_cookie("loggedIn", 1)  #this gives the error.
            response.set_cookie("first_name", login_user[0]["first_name"])
            response.set_cookie("last_name", login_user[0]["last_name"])
            response.set_cookie("username", username)

If you notice the second line, it is an integer value. So it has to have the “secret” parameter. But If I pass the “secret” parameter, the values will be encrypted. Then I changed the integer to a string by wrapping it with quotes as shown below, and it solved my problem.

           response.set_cookie("loggedIn", “1”)

I hope this will be useful to someone in the future because I didn't find any tutorial to help me with this when I had this problem. So I'm sharing my experience. If you think this is a bad practice, or if you know any better solution than this, please feel free to leave a comment and let others know it :)

Modify Jquery Chosen select options dynamically.

Undoubtedly, every web developer would admit that Jquery Chosen plugin is a big time saver for them.  It's not only saving the time, but it takes out the whole pain of modifying and converting those ugly html select boxes into more usable elements. It is even simpler to use because all you have to do is tell the plugin to do the hard work for you, because this plugin wants only a simple select box to do its magic, be it either a single select or a multiple select.

Here I'm going to share something useful I came across recently with this plugin. I hope this will be useful for someone in future :) Most of the times, I used Chosen to display a static dropdown list only. It can be done with a few lines of Javascript easily. But this time, I was using the plugin in a small single page app written using Jquery. When the user adds a new item, the options in the select box has to be repopulated with the new one included.

Modify Jquery Chosen select options dynamically.


I went through the Chosen's documentation expecting to see some hints to get this done. Luckily I found this section.

Updating Chosen Dynamically

If you need to update the options in your select field and want Chosen to pick up the changes, you'll need to trigger the "chosen:updated" event on the field. Chosen will re-build itself based on the updated content.

$("#form_field").trigger("chosen:updated");

So this is what I wanted. And here is how I did this using Jquery. I appended the new item to the options list and triggered the chosen:updated as they have mentioned in the documentation.

var NewTopic = $('<option value="'+data.topic_id+'">'+data.topic_name+'</option>');
$('#choose-topics').append(NewTopic);
$('#choose-topics').trigger("chosen:updated");

This is a simple thing, but chances are there that someone might miss this specific part while reading the docs. That's why I wrote my own blog post too :)

Please do not forget to leave a comment if this blog post was useful to you. Also please share this with your friends in Google+, Facebook or Twitter if you think this will be useful to them.


DragonDisk - A Cyberduck alternative for Ubuntu to connect to Amazon s3!

When I was using Windows, I used Cyberduck to connect to the Amazon s3 to manage my buckets easily.  But now, I'm moved to Ubuntu, and I wanted to have a good s3 client similar to the CyberDuck. So while I was looking for the best alternative, I found DragonDisk which was a great tool  to manage the s3 buckets as in CyberDuck. It has a similar interface to the CyberDuck, so I think it will not be a problem for you to shift from CyberDuck to DragonDisk. So I thought I should write this in my blog so it would be useful for others as well.

Here I'm showing how to install it. If you want further assistance on the software like how to use, please visit the DragonDisk website :) But it's fairly easy to use. Install, add your S3 details, and connect!

Step 01: First Download the release that matches with your Ubuntu installation from this link.

http://www.dragondisk.com/download-amazon-s3-client-google-cloud-storage-client.html

Step 02: It will download a .deb package. Once the download is complete, double click on it to run the installer. (it will open your Ubuntu Software Center to complete the installation.)

Step 03: Click on the Install Button.

Step 04: Finish! Now you can launch the DragonDisk either by using the Unity Launcher or the Terminal.

Press the “Super Key” and type in “DragonDisk” to locate it from the launcher. If you want to start it using the terminal, Open the terminal and type “dragondisk” without quotes and press enter.


This is how the Software looks once you open it.


To create a new account, Go to File->Accounts..

This will open a new window, click on New Button and enter your account details there. You can select the Cloud service provider you are connecting using the dropdown given.

Please let me know if this article was helpful to you. Also please do not forget to share this with your friends in Facebook, Google+ if you think this will be useful to them.

Gmail notifications css style.

Gmail notifications css style.

Gmail notifications css style.

I am working on an interesting project these days. There is this page where I have to display loading messages, success notifications etc. So I decided to make that notification box somewhat similar to the Gmail's notifications box.  The main reason I wanted to make this similar to the Gmail's one is because its so easy to read, and the notifications are not disturbing the user. They look pretty cool, and simple.

I guess you might already have seen these notifications in Gmail so many times? If not check the image above.

Today I'm going to show you how you can create this notification style using css. It's a very simple thing. Let's Start. Here is the css, and there's nothing to explain. :)

.notify-outer {
    left: 0;
    top: 0;
    margin: 0;
    font-family: arial, sans-serif;
    font-weight: bold;
    visibility: hidden;
    z-index: 8;
    position: absolute;
    text-align: center;
    width: 100%;
    height: 100%;
}

.notify -msg-box {
    position: relative;
    display: inline-block;
    visibility: hidden;
    font-size: 80%;
    padding: 6px 10px;
    background-color: #f9edbe;
    border: 1px solid #f0c36d;
    box-shadow: 0 2px 4px rgba(0, 0, 0, 0.2);
    top: -15px;
}

Here is how to use it. You will have to make changes according to your requirements. I change the text of the span #msg dynamically using Jquery. So I have made the notifications hidden by default.

<div class="notify-outer ">
    <div class="notify -msg-box">
       <span id="msg" style="display:none;"></span>
    </div>
</div>

Please feel free to share your thoughts on this. If you think this will be useful to your friends, please consider sharing this post over Google+, Facebook, Twitter etc.

Ubuntu Screen Recording with Simple Screen Recorder

Are you planning to create a video tutorial for Youtube or your website? Looking for the best Screen Recording software for Ubuntu to complete the video without any hassles? Yes, I had the same question like you and I found the best answer. It's SimpleScreenRecorder! The best screen recording software for Ubuntu.

Please note that I have no affiliation nor any kind of a relationship with this software. It's just my honest review about it because it is the perfect solution I found for screen recording in Ubuntu. I wanted to let others know about it too.

Why I recommend Simple Screen Recorder?


There are many factors to be concerned when selecting a software because the requirements are different for each user. But as a rule of thumb, any software should be friendly to the user, and Simple Screen Recorder passes that requirement with a 100% score. It has a simple user interface which makes makes it possible to start using the recorder quickly using the default values.


Features of Simple Screen Recorder for Ubuntu.


  • It has a clean GUI (Graphical user interface).
  • It runs smoothly.
  • Ability to record the whole screen or a part of it.
  • Can pause the recording and start later with a single click of a button without disturbing your video.
  • Shows statistics during recording.
  • Ability to see a preview before recording, so you don't waste time recording something only to figure out afterwards that some setting was wrong.
  • Live streaming.
  • “Ready to start” default values! (this is so nice because all you have to click the record button, because the recorder is already loaded with the default values and you don't have to change them unless you really want to change them.)
Above are only a few of the notable features I liked in the Simple Screen Recorder. There are many more features.

How to install Simple Screen Recorder?


It's easy to install using the terminal. (it is not available in the Ubuntu Software Center and you will have to add their repository to your software sources manually)


sudo add-apt-repository ppa:maarten-baert/simplescreenrecorder
sudo apt-get update
sudo apt-get install simplescreenrecorder

Done!

How to Start Recording.


Once you have installed the simple screen recorder, you can launch it using the Unity Launcher.

Press the Launcher Key / Super Key (Typically the Windows key in Windows machines), and type “simple” without quotes. It will show you the icon of the Simple screen recorder. Click on it to launch the software.


Once you open it, you will get an interface similar to the below one.


Click on the continue button.

Then you come to the main configurations to start recording.


It loads a custom profile. If you want to create your own profile, you can create it by clicking on the new button.

Then it will ask you to enter a name for the new profile and all the settings you select will be saved under your profile. This is useful if you have to record the screen in different ways.

By default it will,
Record your entire screen with a frame rate of 30 fps + your cursor will be recorder. And it won't record audio. So make sure to tick the “Record audio” box if you want to record your voice too.

If you wish to continue with the default settings, click continue button to go the next screen.

In the second step, you can choose where to save your video. By default it will save to your user folder in the /home directory. You can change this to wherever you want. 


Then you can select the format of the video you prefer. Default is .mkv and you can change this too depending on your requirement.

Once you complete setting up this screen, click continue to go the final step.
Here is an interesting feature of Simple Screen Recorder, You can see a preview of your actual recording before you start.

Click on the start preview button to see what you are going to record. This will make sure that you are recording what you really wanted and nothing else :)
 
If you think everything is ok, press the “start Recording” button to start recording your screen. Also you can use the shortcut key, and it is recommended because otherwise your video will start with the SimpleScreenRecorder window in it :)

To start recording using the shortcut, first minimize the SimpleScreenRecorder window. You will notice  the Record icon in your status bar on top. It will have a pause icon. Now press “CTRL + R”. This will start the recording and you will notice that the recorder icon will turn red indicating that the recording has started. To Pause recording for a while, press the same “CTRL + R” again. Now again the icon will turn into the pause icon. You can continue recording your video this way as long as you want.

Once you finish recording, Press the “CTRL + R” to stop recording and open the minimized SimpleScreenRecorder window from your sidebar launcher. You will see a button at the bottom of the screen named as “save recording”. Click on this to complete the video.

Done! You have successfully recorded your screen. Now say “Thank you Simple Screen Recorder” :)

Please share this article with your friends in Google+, Facebook or Twitter if you think this will be useful to them as well.

MySql can't create table errno 121 – Solution!

MySql can't create table errno 121If you are working frequently with MySql databases, it is more likely that you have got this error many times. If you're reading this article to find how to solve this error, you are in the right place. Keep on reading to know how you will get this error and how you can solve this without getting any headaches :)

For those who haven't seen this before, here is the full error message:

Error 1005: Can't create table '' (errno: 121)

I wanted to find an exact solution for this error and write it on my blog so that it will be a reference for others as well.

I referred to the MySql documentation and found this doc, and this error comes under the InnoDB errors section. So now we know this has something to do with InnoDB. Let's read the documentation a little more :)

As the documentation states;

14.21.5 InnoDB Error Codes

The following is a nonexhaustive list of common InnoDB-specific errors that you may encounter, with information about why each occurs and how to resolve the problem.

1005 (ER_CANT_CREATE_TABLE)
Cannot create table. If the error message refers to error 150, table creation failed because a foreign key constraint was not correctly formed. If the error message refers to error –1, table creation probably failed because the table includes a column name that matched the name of an internal InnoDB table.
….........

This is it! The error code is 1005, but it says only about the error 150, which is a different case. I went through the comments and found some nice tips.

Reason for getting Error 1005: Can't create table (errno: 121):


You will get this error if you are trying to add a constraint name that is already used in somewhere else.

As it turns out, you can't have two foreign key constraints with the same name. Simply that's the issue.

If you are getting this error while adding a foreign key to a table, that means you have used that constraint in another table. So just make sure to change the name of your foreign key constraint and save the table. It will work nicely if you have no other conflicts. :)

How to know where else you have used this constraint?
You can run the following query to see where else your constraint is used. I found this in a stackoverflow answer.

SELECT
    constraint_name,
    table_name
FROM
    information_schema.table_constraints
WHERE
    constraint_type = 'FOREIGN KEY'
AND table_schema = DATABASE()
ORDER BY
    constraint_name;


I hope this article will help you to get this error solved! Please do not forget to share this with your friends on Google+, Twitter or Facebook if you think this will be useful to them too :)

Ubuntu system program problem detected - Fix

Ubuntu System program problem detected


Here is another interesting thing! I'm sure many of you have already seen this before or will see after me. This is also another error I came across while using Ubuntu, and I actually have no idea what caused it. It's been popping up since few days..and actually I can't remember what I did. But apparently there was nothing wrong in the system in terms of functionality.

Every time I log into Ubuntu, I'm getting a Pop up with an error message.

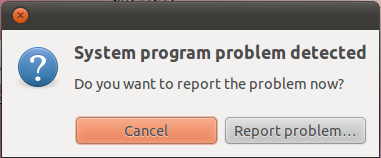
This is what the pop up says :
System program problem detected
Do you want to report the problem now?

There's a button to close the pop up and another one to report this problem to Ubuntu developers. But reporting the problem doesn't make any change either. It might get reported, but still you get the pop up every day when you log in. It becomes annoying after some time. If you have reported this, and want to get rid of the pop up, please read the below paragraphs to fix this error. I've shown how I fixed it.

What did the Pop up really say?


Before you start fixing the error, you should have an idea about the error and how it occurs. (Actually the steps to fix it is really simple!). In Ubuntu, there's a program called Apport, and its task in simple words is to act upon any problem occur in the system and collect information about it, and report it to the user with the steps the user need to follow.

As the Ubuntu Wiki says,

Apport is a system which
  •     intercepts crashes right when they happen the first time,
  •     gathers potentially useful information about the crash and the OS environment,
  •     can be automatically invoked for unhandled exceptions in other programming languages (e. g. in Ubuntu this is done for Python),
  •     can be automatically invoked for other problems that can be automatically detected (e. g. Ubuntu automatically detects and reports package installation/upgrade failures from update-manager),
  •     presents a UI that informs the user about the crash and instructs them on how to proceed,
  •     and is able to file non-crash bug reports about software, so that developers still get information about package versions, OS version etc.

We are sure that this will lead to a much better level of quality assurance in the future.

Read more about Apport in the Ubuntu Wiki.

So basically, whenever your system encounters a crash/problem in a system program or any other, the system actually makes a crash report in a system directory. As the Wiki says, the Apport  program will look for these and keep you informed about the crash until you take necessary actions to fix it.

How to know what program has caused the problem ?


This is a good question indeed. You get the message saying that a system program has crashed, But what is it?

You can see what crash reports are generating the pop up. These crash reports are saved in the /var/crash directory. Open that directory to see the current crash reports. Don't try to open the report :) You wouldn't want to do it unless you are planning to do any debugging. (Here is the Ubuntu Wiki article if you really want to open that file and debug.)

If you are an ordinary user like me, just read the name of the report and try to get an idea like which software has caused it. There's nothing much we can do about those :)

How to get rid of the pop up?


Here is the main section of this article.

In order to fix this error, what you have to do is clear the existing crash reports in your system so that Apport will not find anything to report.

Here's how to do it.

Step 01: Open up your terminal. (press ctrl + alt + T)
Step 02: Enter the following command into the terminal.

sudo rm /var/crash/*

What we do here is clear the whole content of the /var/crash/ directory.

Done!

Now when you log in next time, there won't be any pop ups saying System Program problem detected etc.

Other ways to fix the System Program problem detected error.


Following the above method, you should know that we are actually clearing the crash reports existing in the system to overcome the pop up message. But in the future, if any System program crashes and makes any problem, the Apport will start to show this message again. You can follow the same method to fix it.

But if you are not that much serious about system errors, and if you think you don't want to get this kind of errors reported, you can simply disable the Apport. Then you will not get these error notifications.

To disable this, you only have to change a small configuration value for Apport.

Step 01: Open your terminal (press ctrl + alt + T)
Step 02: Enter the following commands.

sudo gedit /etc/default/apport

as you know, it will now ask for your password. Enter it.

This will open the apport's configuration file in Gedit.

The content of the file will be similar to this;

# set this to 0 to disable apport, or to 1 to enable it
# you can temporarily override this with
# sudo service apport start force_start=1
enabled=1

Step 02: Change enabled=1 to enabled=0:

# set this to 0 to disable apport, or to 1 to enable it
# you can temporarily override this with
# sudo service apport start force_start=1
enabled=0

and save the file.

Step 04: Restart or stop the Apport service. Both will work, you will not get any error notifications anymore because it is disabled.

sudo restart apport

Cheers! You just fixed your annoying problem :)

Note: Even though I have shown you how to disable Apport, I don't recommend you to disable it.  You may not be interested in getting errors reported to you, but it helps you to stay alerted about the changes happening inside the system. You will know whenever a system program or any other software causes any problem. It will be really helpful for you to get them fixed sometimes even by yourself, because you know actually where the error is originated. So think twice before you do it :)

Also please note that you have not actually fixed the error which apport reports to you. What you actually do is stop Apport from reporting about the crashes in your system. The crash is actually not solved. So if you want to fix the error itself, you will have to dig some more..If you are interested, please follow the link I given above regarding the crash debugging.

If you find this article useful, please feel free to share this story with your friends in Google+, Twitter or Facebook!

Shake your logo a little with a simple CSS3 animation!

I just wanted to write this blog post to get your attention to the logo of my blog :)


If you take your mouse pointer over the logo above, you will see a really simple animation I have added to it. Why don't you try it now? :) I said “simple” because it's very easy to do and you only need to add a few new lines to your style sheet. I will show you how to do it.

Also note, I'm going to show you how this animation can be included in a blogspot blog because I know there are hundreds of similar articles written about CSS3 animations and probably many of those articles will already have about this animation too. So there's no point of repeating the same thing, instead I will show you how to add this in your blogspot blog to add some value to this article. Don't worry, the blogspot part is only a addition to this article. You can use the styles in your website too.

Let's Start.

01. First login to your blogger account and go to “Templates” option.
02. Click on the “Edit HTML” button.


03. This will open the source of your template to edit. Press ctrl + F key and search for

        <style type='text/css'>


04. When you find it, insert the following css rules under that line in your template source.

@keyframes shake-logo{
16.65% {
    transform: translateX(8px);
}
33.3% {
    transform: translateX(-6px);
}
49.95% {
    transform: translateX(4px);
}
66.6% {
    transform: translateX(-2px);
}
83.25% {
    transform: translateX(1px);
}
100% {
    transform: translateX(0px);
}
}

.logo:hover, .logo:focus, .logo:active {
    animation-duration: 1s;
    animation-iteration-count: 1;
    animation-name: shake-logo;
    animation-timing-function: ease-in-out;
}


here “.logo” is the class name I've applied to my logo. Remember to add the class “logo” to your logo first. Otherwise this won't work.

I think I don't need to explain the code?

Here the main thing is in the “@keyframes shake-logo“ line. We first define an animation using the CSS keyframes rule, and give it a name as “shake-logo”.

After that we have assigned the animation to our .logo class using the animation-name: shake-logo; property.  Other properties are self explanatory.

So, that's it! Now open your website/blog and see!

Actually what I have shown you here is only the basic application of this animation. So probably this won't work in webkit browsers like Chrome / Safari or Opera ;)

Read the following articles from W3schools and learn how you can overcome this too.

http://www.w3schools.com/css/css3_animations.asp
http://www.w3schools.com/cssref/css3_pr_animation.asp

Hope you enjoyed my article. Do you think I've missed anything? Please feel free to let me know in a comment below.

A simple show / hide password function using Javascript.


We all know that password boxes in any web/desktop applications are masked with an asterisk (*) to protect it from being exposed to others while you type it. But sometimes have you noticed that when you enter your password to connect to a Wi-Fi network, there is a check-box which allows you to view the password that you typed in plain text? That is to make sure
you have entered your password correctly, so you can connect to the network in the first attempt.

I think it's a nice feature to have in any application. But in terms of security, it will not be nice :-)

Anyway, I just liked it and I wanted to make a little login page with that option included. Here is the Javascript function. It's too simple. I'm not even thinking to include this feature in any of my real applications though :-)

Note : Having your password exposed to someone else will make dangerous things happen! Therefore you should never let anybody know your passwords of important and private accounts like Gmail, Facebook etc. A person can even guess your password by looking at the keyboard while you type, and the number of asterisks that appear in the password box. Therefore be conscious.

Here is the code.

Pasword : <input type="password" name="password" id="password" />

<br/>

<input type="checkbox" value="1" name="reveal" id="reveal" onchange="reveal_pass(this); "> Show Password

<script type="text/javascript">

function reveal_pass(check_box){

    var textbox_elem = document.getElementById("password");

    if(check_box.checked)

    textbox_elem.setAttribute("type", "text");

    else

    textbox_elem.setAttribute("type", "password");

}

</script>


Here is a Demo :-)

Pasword :
Show Password


What do you think about the protection of your passwords? Do you think this is a good idea or a bad idea?

Linux chown Example

Linux chown example

chown is a linux command used to change the owner / Owner group of a file or a directory in a Linux environment. Chown is the shorter version for “Change Owner”, and it has an easy syntax so you can enter it quickly. In this article, you will see the most generic form of the usage of this command.

In order to change the owner of a file or a directory, you need to have the root privileges of the system, or you should be the owner of that particular file or directory. If not you can use the sudo prefix in front of your command to run the command as root.

Basic Syntax :

chown [OPTION]... [OWNER][:[GROUP]] FILE...


Before we move in to our examples, let's see how we can check the current owner of the file.

Enter the following command :

ls -l


It will output something similar to this.
-rw------- 1 nimeshka nimeshka 155245 Aug 12 09:55 1.png

-rw------- 1 nimeshka nimeshka  30948 Aug 12 10:09 2.png

-rw------- 1 nimeshka nimeshka 466892 Aug 12 10:18 3.png


the format of the above output is as below;

[permissions] [owner] [group] [size] [modified date & time] [file/directory name]


Example 01 : To Change Owner


chown jeff 1.png


This will assign the ownership of 1.png file to jeff user.

Example 02 : Change the Group


chown :developer 1.png


This will keep the current owner, but change the group of the file.

Example 03 : Changing both owner and group


chown jeff:developer 1.png


You can see that the owner and the group is separated by a colon (:)

Example 04 : Changing the owner of a directory recursively.


chown -R jeff /my/directory


Notice the -R option we passed to the command. -R tells the command to go through all the files and directories inside /my/directory and apply the changes.

If you want to learn more about this command, view the manual page using the command:

man chown


Please share this article with your friends if you find it useful :)

Linux – Fixing Error sudo: /usr/bin/sudo must be owned by uid.

Linux – Fixing Error sudo: /usr/bin/sudo must be owned by uid.Here is another interesting issue I had to solve very recently.  If you have ever used a linux based operating system like Ubuntu, I assume you have had run into problems which happens suddenly, and you have no idea what caused it :)

This is the error I got,

sudo: /usr/bin/sudo must be owned by uid 0 and have the setuid bit set

Now I’m going to tell you how I got the above error and how I fixed it.

I searched in many forums about this, and I found that there are two reasons for getting this error.

01.     Directory “/usr/bin/sudo“  is not having permission 755.     This happens if you run a command like “sudo chmod –R 777 /usr/” - which will set the permission to 777 for all the directories recursively.

02.    Directory “/usr/bin/sudo“  is not owned by the root user. (In case if you have run a command to change the owner.)

My issue was due to reason 01, and I solved it by following the below steps.

First restart your pc, and press the SHIFT key while Ubuntu is booting.

This will bring you up the boot menu.

Select Advanced Options.

Select your OS version in (recovery mode), and press Enter Key.

Ex : Ubuntu 14.04 (recovery mode)

It will bring you up another  screen. Now select “Drop to root shell prompt” and press Enter.

It will load a command line at the bottom of the screen.

Now run each of the following commands.


mount -o remount,rw /

mount --all

chown root:root /usr/bin/sudo

chmod 4755 /usr/bin/sudo

restart

Now your pc will restart. Once you log in, you will find that you can use the sudo command again :)

Please leave a comment if this worked for you.

How to remove Vuescan watermark – Vuescan 9.4 Crack Version

remove vuescan watermarkUpdate: 27th January 2017

Added a video tutorial. Please scroll down to see it. Hope you would find it helpful. Don't forget to subscribe and like the video :)


Few months back I wrote an article about Vuescan Professional software, and one of my experiences about it. After publishing the article, I noticed that many people visited my blog looking for that software, and the problem they had is about the watermark which is embedded into the final image.

So here is the working solution for all my readers :) I’m going to tell you how to remove the Watermark from the final image and use the Vuescan Latest version without any restrictions.

The first thing you should understand is that if you are getting a watermark in scanned images, that means you are not using  a licensed version of vuescan. So in order to get rid of the watermark, either you will have to buy it, or use a cracked version of vuescan. Since you are worrying too much about the watermark, I know you are not going to buy it. So let’s continue with the second method, using cracked version. (But please note that I am not recommending you to use cracked software, I am doing this only for educational purpose and I always encourage you to buy it from the original developers, they deserve it).

Here is the link to the Vuescan 9.4 Cracked version I used to test this.

Download Vuescan 9.4 Cracked version


Video Tutorial on how to remove the watermark.


Once you download the above zip file, extract it and install the version which is compatible with your system (32 bit / 64 bit).

Inside the zip file there is a folder named “Key”, and inside that you can find “key.txt” which contains the serial number.

When you first run the vuescan, it will ask you to register the product. Simply enter the email, customer Id and the serial key from the above key.txt file and as soon as you complete typing, it will show as “OK” in all the text boxes. This means your details are valid :) Click on OK button and continue scanning.

Please read this section if you are still getting the watermark.

Even though vuescan accepts your serial number as valid, it might still show the watermark. The reason is that Vuescan is not remembering your registration data. Here is how to fix that error.

Continue scanning your image as usual. When you are ready to save, do not click on save button. Instead, click on help menu item, and go to “About..”. A popup dialog will appear asking you to enter the Serial number. Now enter your data there and save the image.

Boom..No watermark B)

Please let me know your comments about this.

Happy Scanning :)

jQuery Validator Validate by class name


It’s no doubt that the jQuery Form validator is a big time saver for most of the web developers around. It helps you to do the client side validation of forms without any difficulty. Recently I wanted to validate a group of form fields (a several Price Fields), which should not allow negative values. But the existing rule I have being using was only that it is required. So I had to change that, and I found that I have been doing the validations based on the field name. But my current requirement is for many fields having the same rule. So I was looking for a way to get it done in a single rule (using the class name)

Here I have found two solutions to achieve this, and I share it with you all expecting it will help to save someone's time :)

Tip: Opt out your common rules and enter the other rules inside the $().validate() as usual. You can enter common rules inside below methods after this.

Method 01: Using jQuery Validator’s  .rules() method.

Ex : I want to validate all the price fields (having class “.price”).

$('.price').each(function() {
            $(this).rules("add", {
                required: true,
                min: 0
            });
});

Note: You can use this only after the $().validate() method is called. Otherwise it will not work.

Method 02: Using the addClassRules() method.

This method is developed mainly for this type of validations. It does the iteration through all the elements by itself, which we did manually in method 01.

$.validator.addClassRules("price", {
     required: true,
     minlength: 2
});

Note: Unlike in method 01, you don't need this method to be after the $().validate() always. You can even call this method before the $().validate().

Please leave a comment and let me know if this was helpful to you.

Creating a simple 3D button with pure CSS


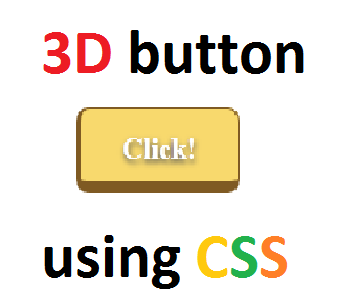
I'm sure that all of you might have seen a 3D (Three Dimensional) button in a website somewhere. There are many websites which use 3D buttons to grab the user attention;  they are really interesting to check out as well as to create.  So here is my very simple approach to create a 3D looking CSS 3 button. This is the very basic way to create a 3D button in CSS and it does what you expect. It has a 3D appearance; it has a 3D effect when you click on it :)


Here is the demo of the button.

NOTE: This was made only for fun. If you willing to use this in your website, you may consider to modify this.
  
Click!

CODE:
 <html>
    <head>
        <style>
            div { width: 100px;
                  height: 30px;
                  background: #F8D96D;
                  border-bottom: 7px solid #7F5A23;
                  border-left: 3px solid #7F5A23;
                  border-top: 1px solid #7F5A23;
                  border-right: 1px solid #7F5A23;
                  border-radius: 8px;
                  text-align: center;
                  padding-top: 10px;
                  color: #ffffff;
                  font-weight: bold;
                  font-size: 18px;
                  text-shadow: 5;
                  cursor: pointer;
                  text-shadow: 0px 2px 3px #555;
            }

            div:hover {
                background: #F7D86B;
            }
          
            div:active {
                border-top: 4px solid #7F5A23;
                border-bottom: 1px solid #7F5A23;
            }
        </style>
    </head>
    <body>

        <div>
            Click!
        </div>

    </body>
</html>


Please let me know your thoughts about this :)

Online HTML Preview

Online HTML Preview


online html previewHello friends, I developed another interesting tool for you today :)

Here is a little and a simple tool to write and preview html codes on the fly. Just type your html codes inside the textbox and see how it renders your html code below. Have fun…and make use of it.

Don’t forget to share this with your friends ;)


Type your HTML code here


Your Preview


 Tags : online html preview, html preview, online wysiwyg html editor, online html generator, online html editor wysiwyg, online html creator,online html editor with preview, online html text editor,online editor html, wysiwyg html

Oscommerce Password Generator

oscommerce password generator
Here is a little simple online tool for all those who are looking for a way to change the password of your oscommerce user account or your oscommerce admin account. You can simply put in your new password in the text box below, and click the generate button. This tool will generate the (MD5 + salt) hash which you can manually update in the database using phpmyadmin.

Note: Sometimes it might take 3,4 seconds to generate the password. Please be patient :)

Online Oscommerce Password Generator


Enter Your New Password :


Generated Password :

Get template file name in Wordpress easily!


You found a nice template for your Wordpress website, and then you noticed that you want to make some changes in that template to make it friendlier with your website. You have no idea which template file is delivering that content, and you don’t want to mess with a lot of codes to find that file name. You want a method to get the template file name easily.

Ok, here I have found an awesome, yet simple wordpress plugin which will do that task for you. It’s called “What the File!”.  It will show you the name of the template file which delivers the current content. Simple.


get the template file name in wordpress. What the File

First go to this link and Download the plugin. (or directly install it from Wordpress admin)

Once you complete the installation process and enabled the plugin, go to the page which you need to find the template file.

Then on the top admin navigation bar, you will find a new menu item called ‘What the File’. When you click on it, a dropdown menu will open with the template file name :).

You can click on that file name link. It will take you to the wordpress template editor page with that file opened their. All you have to do is edit.

If you wish to edit it outside the Wordpress admin panel, you can get the path and file name, then login through your FTP and make changes and upload it back.

I hope this article will surely save your time :) Please leave a comment to appreciate the time I spent to write this article if it was helpful to you.

Happy template editing ;)

Joomla Last Database Query!

joomla database queryJoomla is a popular CMS used in creating websites easily without need to know the web development languages such as html or php. However, if you are a web developer who develops custom modules or components for Joomla, you will definitely have to face situations where you need to print the last executed mysql database query for debugging purposes. The scope of this article is to show the way of printing the last query.


As I have already mentioned, the following method is very useful when debugging your database related bugs in your Joomla component or module. Let us assume that you are running a simple query as below;

$db = JFactory::getDbo();
$query = $db->getQuery(true);
$query->select('*'); 
$query->from($db->quoteName('my_users')); 
$query->order('user_id ASC'); 
$db->setQuery($query);  

What I have done here is simply selecting all the data from my “my_users” table. I believe you already know what you have to do to get the data and print it from the above query. Let's say if you did not get the expected results from the above query, and you are sure that the table already has got data in it. Then definitely there should be something wrong with the query. So let's print it and see whether our query is properly generated. Adding the following lines below the above code will print the last query which is being executed.

echo $db->getQuery();
die(); //break the code below this line.

Now you can see the query in plain text, so you can check if there is anything wrong in it like incorrectly spelled table name, column name or any other mistake in your query. Also you can run this query in your phpmyadmin / or your mysql client software and see if it returns any data.

Joomla database query, Joomla Database, Joomla mysql Bug


Find the host name of the mysql connection in PHP

Find the host name of the mysql connection in PHPIf you ever face any situation where you want to get the name of the mysql host you / your web application is connected to, you can use the following little query and find it easily. I recently worked in a project which was initially developed by someone else, and I had to make some minor changes in the codings and the database tables. So I looked for the connection file and found out that the host name mentioned there was localhost (as usual). I had no cpanel login details with me. Besides, for database things what I usually do is, I make a connection to the database using my Navicat and run all queries there as it saves a lot of the time.

In cases where I need to find the host name, I use the following mysql query. Here is how you can use it in your PHP application and quickly find out the mysql hostname.

<?php
$sql = "SHOW VARIABLES WHERE Variable_name = 'hostname'";
$qdata = mysql_query($sql);
print_r(mysql_fetch_array($qdata)); // prints debug.
?> 

Now you can easily connect to the mysql database with your favorite database client.

Please feel free to leave a comment if this article was helpful to you :)

Embed FLV video in HTML

Embed FLV video in HTMLA “Video” is an essential element for many websites today. Unlike in early days, the usage of videos have significantly increased among internet users and the websites today. People tend to watch and react for videos very much than the usual static images. The availability of high speed internet connections and the many number of free video sharing websites like Youtube have made people to watch videos regularly. So as a webmaster, if you are not making use of videos in your website, you are losing many additional benefits you can get from your website.

When embedding videos in a website, you will have two options to select from.
  • Hosting your videos with a free video sharing website like “youtube.com”. 
  • Hosting in your own web server.
The main focus of this article will only be on the second option. We are discussing how to embed a video in your website which is hosted on your own web server.

Also, note that we are specifically talking about embedding FLV videos only.

We know that with HTML5, a new tag for embedding videos was introduced to embed videos in your websites. That is very easy to use and you can find many articles in internet for HTML5 video embed code samples. But the bad thing about this great HTML5 video tag is, you can't use this tag to embed FLV videos in your website. So definitely you will have to go for an alternate solution, and in this article I will show you a nice script which you can use to embed FLV videos easily in your HTML website.

To embed FLV videos, we are using a swf file which can be downloaded from the following URL.

code.google.com/p/youplayer/downloads/detail?name=mediaplayer.swf 

Download the above file and place it in your root directory, or the directory you have uploaded your FLV videos. I recommend to keep your FLV videos and this .swf file in the same directory.

Now, in your web page where you would like to embed the FLV video, you can paste below code. Make sure that you change the file paths correctly.
<embed allowfullscreen="true" height="250" src="/videos/mediaplayer.swf?file=my_video.flv" width="400"></embed>
 
The output of the above code will be as shown below;

Embedding FLV video in HTML
 

According to the above example code, the “mediaplayer.swf” is uploaded to the 'videos' folder, and my FLV videos are also in the same directory. I can now simply call the flv video file only using its name 'my_video.flv' since both the video and the .swf file are in the same location.

Even though we have discussed only about FLV videos here, you should know that this method can be used to embed any other common video formats in your website. This method is very useful when inserting FLV videos, since the native HTML5 tag doesn't support FLV.

I hope my article was helpful to you. If you find any errors or mistakes in my article please feel free to correct me :) 

Embed FLV video in HTML, FLV Html5, HTML video embed

How to edit any web page from your browser?

edit web page using browserIn this article I'm going to show you how you can edit any webpage using your browser.

First of all, remember that this is not a permanent edit to the webpage. We all know that when we are viewing a website, what happens is that simply we send a request to the web server asking for a particular webpage / website, and then the web server returns the HTML web page to us. Since we cannot convert this HTML content into a readable or visually pleasing content, we use web browsers to do this task on behalf of us, and show us the webpage.

What we do here is, we will change that HTML code returned by the web server, so the web browser will show the page as we changed it. Nothing is not going to be changed in the server side, ie. we are making changes only in the HTML code returned by the web server. It is like editing a copy of the web page we temporary have :)

I am using Firefox Web Browser to do this task. But you should know that this trick is not limited only to Firefox. You can do the same thing using Google Chrome as well. Since most of the steps will be remained similar in both the browsers, I will explain this only for Firefox. You can ask me anytime if you want support with any other browser.

How to Edit Web Page using Browser?

To start the trick, Go to any website. Here I am selecting my favorite search engine, Google.  http://www.google.com You may choose any website you like.

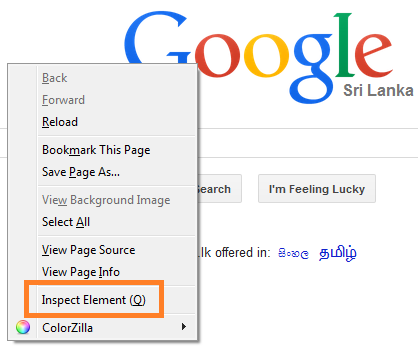
Once the web page is fully loaded, right click on an empty area and select "Inspect Elements" Option (which is the last option, in most cases). You can also use the shortcut key “F12” in Windows to activate this panel.

When you click on that, a window will open in the bottom of the screen (see the image below). There will be a small icon in your top left hand corner (It is an icon of a mouse pointer). Clicking on that icon will toggle a tool which you can use to select elements on the page.

With this tool you can select any element in the web page and edit it. In this example, I am going to replace the country name shown below the Google's logo with a my own version. These steps will be the same for every element inside the page.

Click on the above Mouse Pointer Icon. Once it is activated, click on the text below the Google's logo to select that text element. Since I am viewing the website from Sri Lanka, the text appeared here is “Sri Lanka”. I will change this text and type something like, “Sri Lanka - The Miracle of Asia”, which is more suitable :)


So first I will click on the text “Sri Lanka” using the select element option. Then in the inspect window, the selected text will be appeared. Now you can double click in the text inside inspect element window to make the text editable, and change the text as you wish.


This is one of the simple ways you can edit any webpage inside the browser window. (There are few other ways too). This tool is very useful for web developers and designers to make changes in a webpage which is under development, so they can see what is needed to be changed and give it a try in the browser itself without editing in their editors and reload the page to see the changes.


Bonus Tip for non techies :)

Well, I know that all of you are not Web Developers or Web Designers. So what's special for you?

Don't worry..I will tell you one thing...If you have any friends in your office who are always having their web browsers opened, you can use this trick. (make sure that they don't see you :D) Have fun!!!

Also, if you enjoyed this article please do not forget to leave a comment :)

Jquery Image Popup on page load simple plugin.

Jquery Image Popup simple pluginAn image popup sometimes become a very important element / feature to a website. We usually use popup images as banners to notify something important to our visitors. In the recent time I came through many occasions where I had to use this kind of an image popup when the page loads. There are many Jquery Image popup plugins available now. But the major disadvantage is that sometimes they are going beyond the expectations. I mean most of the Jquery plugins for popups are large in size or much advanced when compared to the simple requirement sometimes we need, which is just to insert a popup image in the webpage when the page loads.

Today I wanted to insert another image popup to a website, and the website was already using Jquery. But my concern was that I had a very limited time to implement this on the website, and since this website was having very big traffic, I did not want the plugin to be too big. Besides, this was only a temporary one. So I looked for a nice, yet simple and a light weight Jquery Plugin.

While searching, I found this simple plugin called 'Colorbox'. It matched my requirement exactly, and it was very light. No round ways like in other plugins and you get the ability to use it straight.

You can Download the Plugin and the other necessary files through link :

popup.zip - Download Jquery Image Popup Plugin.

This folder contains all the css, images and the javascript files.

How to Use this Jquery Image Popup Plugin?

It is simple. Once downloaded, extract the contents inside the zip archive into a folder in your website root. We'll call this folder as "popup".

Now your website structure would look like,

Document Root (public_html)
 |---   popup (our new folder)
 |---   your_other_folders
 |---   ...
 |---   index.html

Now open your desired file (which you need to insert the image popup) and put the following code in between your <head> </head> tag.


<link href="popup/colorbox.css" rel="stylesheet"></link>
<script src="https://ajax.googleapis.com/ajax/libs/jquery/1.8.3/jquery.min.js" type="text/javascript"></script>
<script src="popup/jquery.colorbox-min.js" type="text/javascript"></script>
<script type="text/javascript">
$(document).ready(function(){
    $.fn.colorbox({href:"popup/popup_image.jpg", open:true});
});
</script>


That's It....If you want to make the popup to appear a few seconds after  the page is loaded, you can change the script to below;


<script type="text/javascript">
$(document).ready(function(){
    setTimeout(function() {
        $.fn.colorbox({href:"popup/popup_image.jpg", open:true});
    }, 1500);
});</script>

Where 1500 represents the delay in miliseconds.
 

Hope you enjoyed my article. Please do not forget to leave a comment if this was helpful to you. :)
 

Incoming Terms :
jquery image popup
jquery popup image
jquery simple popup
jquery open popup
jquery popup window
jquery popup