Bash - Switch STDERR to STDOUT


Bash Switch STDERR to STDOUT

Today I wrote a bash script to create a very simple porcelain client on Git to add and commit files without entering all the git add, commit commands. I personally don't like to use Git clients with GUIs because they are somewhat complex, and I really love working on the terminal and the comfort of typing on my keyboard. But typing all the commands every time when working with Git isn't productive as well. So I decided to create a small client so I can just run it and do all the basic repetitive tasks through it.

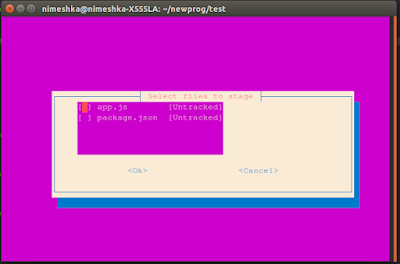
Since I wanted to run it in the terminal and also to reduce the usage of mouse, I used whiptail to generate all the UIs inside the terminal to select files and commit. However, while working with it, I noticed that some components of whiptail, like checklist, for example, uses STDERR to return its output. I have no idea why it prints the output on STRERR, but I wanted it to print to the STDOUT. So here's how to do that redirection.

You just have to add the following at the end of the line you need.

3>&1 1>&2 2>&3
Example:

whiptail --separate-output --title "Select files to add" --checklist " " 10 60 5 '$filelist' 3>&1 1>&2 2>&3

What it does?

Well, I hope you already know what are file descriptors. If not, basically there are three of them,

0 - STDIN
1 - STDOUT
2 - STDERR

in addition to these specific FDs, there are 3-9, and they can be created as we want. In the above line, what we actually do is,

3>&1 = we create a new file descriptor 3, and points it to the STDOUT (& sign is used to refer to another FD, and here we actually create a temporary FD 3 to hold the STDOUT).

1>&2 = Then we redirect the STDOUT to STDERR. We actually needed the above line because we switch it here, and if not for the above, we would lose the reference to STDOUT after the switch.

2>&3 = Now we simply redirect the STDERR to the FD 3 we created, which is currently redirected to the STDOUT.

Now you see that we have switched STDERR to STDOUT and vice versa :) I hope this is clear and will be helpful to someone. I only wanted to write this here so I can refer to it on a later day in case I forget. But if you ever come across this post, don't forget to leave a comment.
Ubuntu touch: Change the created or modified date of a file using terminal.

Ubuntu touch: Change the created, access or modified date of a file using terminal.


Last week I wrote an automation script, which (a part of it) generated some files, and I wanted to store them for a maximum of three days. So along with the script, I wrote another bash script to delete any files which are older than three days, and I set it to run as a cron job.

After writing all the scripts, I wanted to test whether they work. For tests, I needed some files which are at least three days old and useless at the same time because my script will be deleting them.

So how did I do that?

I believe you all know about the touch command. What does it actually do? Well, I'm sure most of us will say "we use it to create a file". It's true. But that's not what touch command does. Its real purpose is to change the access and modification time of a file. It will create a new file only if it doesn't exist ;) So this blog post is about how to do it. I thought of sharing it in my blog for my own reference as well as a help for those who will be looking for it in the future ;)

In the touch's manual page, it says:

Update  the  access  and modification times of each FILE to the current time.

A FILE argument that does not exist is created empty, unless -c  or  -h
is supplied.

A  FILE  argument  string of - is handled specially and causes touch to
change the times of the file associated with standard output.

Mandatory arguments to long options are  mandatory  for  short  options
too.

So, that's it. You just have to add the -d parameter and pass in a timestamp and it will create the file with given date / time. If the file already exists, it will modify the access / created time to the given one. Too easy right? For my specific requirement, the following command was enough for me.

touch -d '4 day ago' test.txt

As you can see, the value given to the -d parameter could be a human friendly syntax like shown above. You can also pass in a timestamp if you wish. Please read the manual page for more information on that.

I hope this will be helpful for someone :)

View and edit files inside a docker container.

How to view and edit files inside a docker container.


Today I deployed a new service in a docker container and found that service wasn't working as expected. Since it was working in my local environment, I guessed that it could be due to a small issue. So I decided to access the files inside the docker container and do some manual debugging. I wanted to write down the command to access the terminal of the container in my blog for my own reference. Hope this will help others too.

So here's how to get into the terminal / bash prompt of your container. Just run the following command.

docker exec -it <your-container-name> bash
That's it. I hope you know that you can get a list of all running instances by giving the docker ps command ;)

One last thing, since I mentioned about editing files. Docker by default, doesn't come with any editors like nano or vim. You may need to install them manually. It's super easy, in case you don't remember, just run:

apt update
apt install vim
Hope it helps :)